Monthly Archives: December 2013

2D Platform Game IOS Port – Part 2

Welcome back. If you haven’t read the first part of this blog post please check it out here. Otherwise, you can download the project source from the Downloads page.

Last time I showed you how to create a new tile map for the 2D Platform Game I posted, but we didn’t get into any of the details on how the project actually works. I said that I made a few changes from the original source code written by Paul over at http://www.wildbunny.co.uk, and now were going to dig right into them.

Class Hierarchy

Code Structure

Code Structure

The class hierarchy for the game is identical to the original source.

hierarchy chart

hierarchy chart

The Player inherits from the character and the character inherits from the Moveable Object.

The Moveable Object class contains all of the generic collision detection code required for an object to interact with the world.If you wanted to create a new “character” in the game, such as an enemy, you would subclass the character class just like the player class does.

These three classes are what make this game work, but they require that we pass in a Map object during initialization.
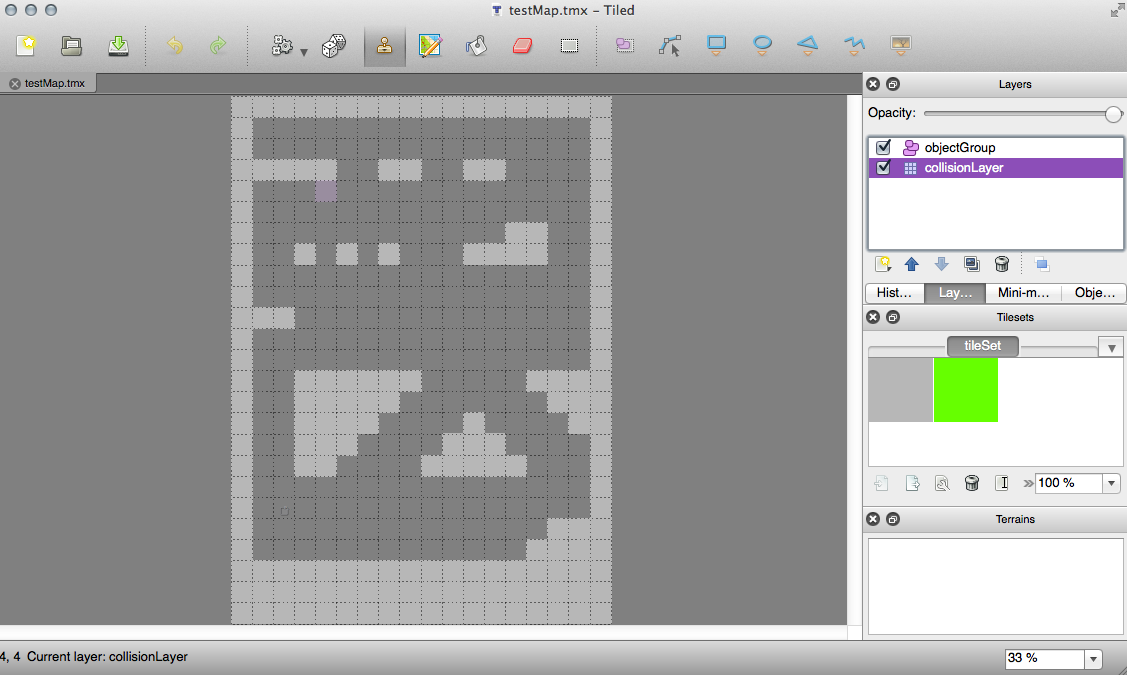
The Map Class

The Map class is simple enough, it accepts a .tmx tile map during initialization, and aside from being passed as an object to the characters of the game, should not be touched.

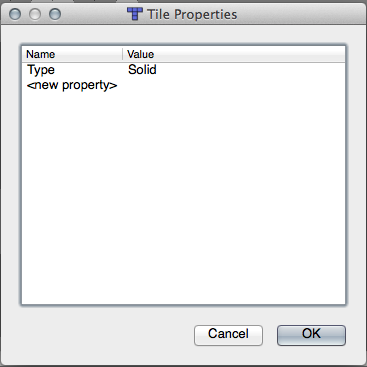
The job of the map class is displaying the layers of the .tmx tile map, and giving key information about tile locations and types to the moveable object hierarchy. As you further develop this project, you will be able to add more tile types to the map class.

Player Input

The main problem porting the code from the original action script to objective-c was player input. Since we are working with a mobile device with touch input, wer’e not able to read inputs as they were before. In order to solve this problem, I had to implement two new classes.

These classes are “GSButton” and “GSDPad”. Both classes are very similar and could probably be combined into one class given a little more time.

Each of these two classes derive from the CCLayer class and accept images during initialization. They read player input and return their state with a property called “isPressed” for the GSButton and “isPressedLeft” or “isPressedRight” for the GSDPad.

The touch area of each object is currently restricted to the image’s content size, but can easily be extended for better responsiveness.

Game Layer

The last class to talk about here is the “GameLayer”. This class is where all of the other classes are put into use.

As it stands, the GameLayer has one map object, one player object, one dpad object, and one button object.

GameLayer class init method

GameLayer class init method

Durring initialization, the GameLayer loads the games tile set into the shared sprite frame cache. It then creates the map layer with the .tmx tile map file and adds it as a child of the layer(note: if you want to change the name of the map file, this is the place to do so). 

The GameLayer creates the player object and initializes it with the map object and adds the player object as a child of the map object.

The dpad and button objects are created and added as children of the layer as well, and an update is scheduled for the layer.

GameLayer class update method

GameLayer class update method

The update method for the GameLayer class is very simple. it has two jobs at the moment

1- Send info about the current state of the button objects to a singleton class called “VariableStore” that is accessible by all classes.

2 – Call the setViewPointCenter method.

GameLayer class setViewPointCenetr method

GameLayer class setViewPointCenetr method

The setViewPointCenter: method is a method for moving the camera to follow the player originally found here. For now it does the job, but it can be moved and adjusted to incorporate smooth camera movements.

Conclusion

Well, thats about all I have to say about the code of this project without getting into anything too technical. Remember, if you want to know the gritty details about how these classes work, namely the MoveableObject class, you can find a great tutorial here by Paul Firth.

Else, leave me a comment or suggestions.

Thanks for reading!

2D Platform Game IOS Port – Part 1

Introduction

Hi everyone, welcome to my new blog. For my first article, I decided to write about a 2d platform game example I first read about here. The technical details relating to the example can be read on Paul’s blog in the link above, so I won’t go over them again.

The project I have posted is a port of the FREE! source code offered by Paul here, with added support for the FREE! Tiled map editor, and a few other tweaks.

Tiled Map Editor Screen Shot

Tiled Map Editor Screen Shot

cocos2d Logo

cocos2d Logo

The framework i chose to use for this project is cocos2d, a popular open source framework with a large community. More info on the framework can be found here.

Tile Map Design

The biggest deviation from the original source code is the addition of support for the Tiled map editor. With support for Tiled, it becomes very easy to design and insert new maps into your project. but before you go off and start creating all those maps, there are a few things you must know.

You will need a tile layer named “collisionLayer”.

collisionLayer

Layers Box

You can do this by clicking on the “Layer->add tile layer” in the menu bar.

This is the layer that will hold the tiles that represent collidable tiles in the game.

Once you have your collisionLayer, you will need a tile set to accompany it. Note: you can only use one tile set per layer. 

tileset

New Tileset Form

To add a tile set to your map, click”Map->New Tileset”. A form will popup allowing you to browse your hard disk for your tile set. Click ok once you are done loading in your tiles.

Now that you have your tile set loaded into the editor, your going to need to add  some properties to your tiles in order for the game to recognize them as collidable objects.

tilesetWindow

Tileset Box

In the tile set window, right click on the tile that you want to make collidable, then click “Tile Properties”.

tileProperties

Tile Properties Form

You will be presented with a popup window, shown above, and from there you will be able to add the property with Name: “Type” and  value: “Solid”.

This will make it so that the player cannot pass through this type of tile.

Wow, thats a lot! But theres still one more thing we need to do before we can get to the fun part. We need to add an object layer so we can store the players spawn point.

Click on the “Layer->add object layer” and name it “objectGroup” like we did with the collision layer. Now make sure the object group is highlighted in the Layers window and click on the “inset rectangle” button in the toolbar. ir

Click anywhere in the editor window to create a new object in your objectGroup layer.

og

After you’ve gotten it to look like the photo above, right click on the new object and click “object properties”.
op

Name the object “PlayerSpawn” and click “ok”.

Once you are done with all that you are ready to start drawing your map. Make sure the collision layer is highlighted and select the tile that you made “Solid”. Use this tile to fill the map areas that you don’t want the player to be able to move through.

mapping

Now that you have created your masterpiece, its time to save it and upload it into the project. Click “File->Save As” and name the map “testMap”.

Loading Your Map Into The Project

So, I’ve got my new map… what now?

Fire up Xcode, with the project you can download from the Downloads page. Delete the map I built for you :”( and copy yours in. Next view the map file in Xcode and fix the tile set file extension as shown below.

Update: Tiled exports the map with a path that looks something like this:

source="2dPlatformer_Port/2dPlatformer_Port/tileSet.png"

depending where you imported your tile set from. What we want is for the path to look like this:

source="tileSet.png"

otherwise the layer containing that tile set will not show up in the game. The picture below shows what it should look like.

fix

After you have done that, you are ready to build and run the project with your map!!!

Well, that concludes the first part of my blog post. I didn’t expect it to be this long, so I will continue with a part two including detailed information about the code side of the project soon.

The project source can be downloaded from my Downloads page. Thanks for taking the time to read through my blog. If you have any questions or suggestions, please leave a comment below.  If you enjoyed reading my blog and wish to help support my work, please go to the Donate page

Note: donations, although greatly appreciated, are never required.